My Toll Farm Tools
Beginner guide · verified August 25, 2026

How to Play My Toll Farm: Complete Your First Toll Loop

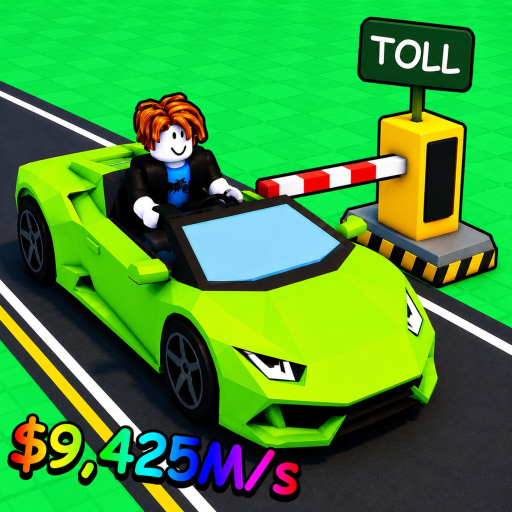
Quick answer: roll one car, inspect the visible result, place or keep it, watch it pass a toll, confirm the income display changes, then reinvest one measured step at a time. Exact button positions and hidden formulas are not verified by the checked public sources.

Multi-source reportedOfficial
Direct answer

Finish one roll → place → toll → income cycle before optimizing

The useful first-session milestone is not a specific car or cash total. It is proving that you can acquire one usable car, put it into the active path, observe one toll pass, and connect that pass to a visible session value.

The loop is repeated across sampled public gameplay narration. The official Roblox description confirms the incremental-simulator context, autosave statement, group reward mention, and private-server lag suggestion.

Community-reported direction

How to pick up or move a placed car

A public gameplay exchange gives one bounded direction: go to the right side of your plot and look for a small glowing interaction point near the car-placement area. The keyboard, mobile, and controller prompts are not readable in the source, so follow the live prompt in your own server.

  1. 1. Walk to the right side of your plot.
  2. 2. Approach the pads or area where cars are placed.
  3. 3. Look for a small glowing interaction point nearby.
  4. 4. Move close enough for the current prompt to appear.
  5. 5. Follow that prompt to pick up, move, or replace the selected car.
  6. 6. If every pad is full, record total income before changing one position.
  7. 7. After the move, wait for the same toll cycle and reread the same income display.

If no prompt appears

  • Move closer or approach from another side.
  • Confirm this is your own plot.
  • Wait for the plot and UI to load.
  • Rejoin once if the interaction appears stuck.
  • Do not assume all devices use the same input.
  • Do not replace several cars while troubleshooting.

What this does not prove

The exchange does not make an exact button, ownership rule, replacement warning, or permanent post-update location readable. If V3 differs, use the live prompt.

View the public exchange →
First-session route

Ten steps from loading in to your first measured upgrade

Follow the labels in your live server. If the UI differs after an update, preserve the decision order and use the current on-screen wording.

  1. Step 1

    Open the official Roblox experience and wait until your plot and the live interface finish loading.

  2. Step 2

    Find the visible cash and income displays, then write down the values before spending anything.

  3. Step 3

    Use the entry roll action shown in your current server and inspect the result before accepting another action.

  4. Step 4

    Read every visible car label exactly as shown; do not infer a rarity, mutation, or hidden probability from color alone.

  5. Step 5

    Place or keep the first usable car by following the current in-game prompt, leaving room for a later comparison when possible.

  6. Step 6

    Watch one car complete the toll path and confirm that a visible cash or income value changes.

  7. Step 7

    Repeat the loop once, then compare the new result with the weakest car or an open slot instead of replacing blindly.

  8. Step 8

    Choose one visible, affordable upgrade only after you can state what number or outcome you expect it to improve.

  9. Step 9

    Record the live value again after that single change so the effect is not mixed with another purchase.

  10. Step 10

    Save for the next clear improvement, or use the money guide when several prices compete for the same cash.

Pacing checkpoints

What to aim for in the first 5, 15, and 30 minutes

These are orientation checkpoints, not guaranteed timers. Server load, UI changes, random results, and player pace can all move them.

First 5 minutes

Orient and complete one loop

  • • Confirm you opened the JOFO Games experience.
  • • Locate cash, income, the roll action, your plot, and the toll path.
  • • Roll once, keep or place one usable car, and watch it pass a toll.
Around 15 minutes

Compare instead of guessing

  • • Repeat the roll-to-toll loop and note what changed.
  • • Use an open slot before replacing a working car when the current plot allows it.
  • • If every slot is full, identify the weakest observed contributor before swapping.
Around 30 minutes

Make one measured upgrade

  • • Choose one purchase with a visible price and a testable purpose.
  • • Measure before and after; avoid stacking several changes in one test.
  • • Decide whether to save, fill a slot, replace a car, or improve a visible system next.
UI reading guide

The four live areas that matter first

No screenshot is shown because no checked public image meets the current evidence and reuse requirements. Use this table as a find-and-confirm checklist, not a claim about exact placement.

Area to findWhy it mattersHow to verify itEvidence
Cash balanceShows what you can afford now.Read the live number in your session; no checked public frame clearly verifies the current layout.Multi-source reported
Income / rate displayLets you compare the session before and after a change.Record the same display twice; the checked public sources do not establish its exact current position.Multi-source reported
Roll and result areaStarts the reported car-acquisition step and shows the current result.Exact controls remain unverified in the checked public evidence.Multi-source reported
Plot and toll pathShows whether a kept car enters the earning loop.Watch one complete pass; exact payout rules remain unverified.Multi-source reported

Before the next purchase

Once your first toll income is visible, check whether Quests or the Cars Index has an earned reward waiting to be claimed. Follow the Quest and Index reward steps →

Placement rule

Can't place another car? Check road capacity first

If the game refuses placement and says another line is needed, check Traffic Lines / Traffic Lanes, the capacity upgrade described in published guides. A newly rolled car does not necessarily have room to join your active road.

  1. Read the placement message before buying anything.
  2. Check the road-capacity panel named in that message.
  3. If it offers another line, review its displayed cost and result.
  4. Otherwise, use the available unequip or replacement control to change one occupied position.
  5. Retry one placement and confirm that the car becomes active.

Do not use Delete as routine troubleshooting: a refund or undo is not established here. Roll Luck or Roll Areas may not clear a road-capacity error.

This branch applies when placement is refused. If the car is already placed but cash does not increase, return to the first-loop checks instead.

Capacity guidance comes from a published beginner guide and placement FAQ, not a new device-specific control test. Follow the labels in your server.

First upgrade rule

Buy only what you can remeasure

A visible price plus a clear before/after value is more useful than a copied “best upgrade” claim. Public panels confirm Toll Level, Roll Luck, and the current Roll Areas label, but their exact payout and rarity formulas remain Unknown.

No-Robux route

Learn the standard loop first

Roll, place, observe, and reinvest using visible session values. Optional paid products are not required by this walkthrough, and this page does not assume their availability or value.
Common mistakes

What usually breaks a clean first test

Buying several things at once

You lose the ability to connect a result to one choice. Change one variable, then reread the live display.

Treating color as a verified stat

Use exact on-screen labels. A visual treatment alone does not prove rarity, mutation, payout, or probability.

Replacing a working car without a baseline

Record the current value and the candidate cost first; otherwise the swap cannot be evaluated.

Assuming Roll Luck equals exact rarity odds

No current verified source publishes that mapping or guarantees a specific result.

Following copied UI directions after an update

Use the current server labels because button names and positions can move.

Leaving immediately after a purchase

The description says autosave, but allow a normal session state and use the save guide if progress later looks wrong.

Progress looks missing

Reconnect once and allow a normal load. The official autosave statement does not prove every interrupted state can be recovered.

Open save progress help →

The game feels laggy

Lower Roblox graphics and test another server. A private server is a developer suggestion, not a guaranteed fix.

Open private server help →

Group reward did not appear

Confirm membership in the verified JOFO Games group, then rejoin once. The amount and exact claim flow are not documented.

Open group rewards help →

Beginner FAQ

What is the basic My Toll Farm gameplay loop?

Sampled gameplay narration consistently describes a loop of rolling a car, inspecting or placing it, letting it pass a toll, collecting income, and reinvesting. The official public description calls the game an incremental simulator but does not document every control or formula.

What should I do first in My Toll Farm?

Locate the live cash and income values, use the current roll action once, place or keep one usable car, and watch it complete one toll pass before spending on several upgrades.

Should I fill an empty slot or replace a car?

When an open slot is available, filling it is usually the easier first test because it does not remove a working contributor. If every slot is full, measure the weakest observed option before replacing it.

How do I know whether a car is better?

Use the exact labels and visible income change in your own session. The current evidence does not support a complete public car-stat table, so color, rarity chatter, or a video title alone is not enough.

Which upgrade should a beginner buy first?

Choose the cheapest visible option whose effect you can test. Record the relevant value before and after one purchase, then use the money guide if several upgrades compete.

Can I start without Robux?

This guide uses only the standard visible gameplay loop and does not require a paid shortcut. Availability and pricing of optional paid products can change, so check Roblox before spending.

Does My Toll Farm save automatically?

The official developer description says progress saves automatically. That supports an autosave claim, not a guarantee that every interrupted or disconnected session can be recovered.

Is there a JOFO Games group reward?

The official description says to join the group for rewards, but it does not state the reward amount, timing, or exact claim flow.

Does a private server fix lag?

The developer suggests trying one for lag. It is not a performance guarantee; device, connection, server state, availability, and price may differ.

Are Roll Luck percentages the odds of getting a specific rarity?

No verified source currently maps the displayed percentage to exact car-rarity odds. Treat Roll Luck and rarity probability as separate until the game or creator publishes that mapping.

How do I pick up a car in My Toll Farm?

A public gameplay exchange points players to the right side of the plot and a small glowing interaction point near the car-placement area. The exact device prompt is not readable, so use the control shown in your current server.

Why can’t I move a placed car?

Confirm you are at your own plot, approach the placement area from another angle, wait for the UI to load, and look for the live interaction prompt. If it still does not appear, rejoin once before changing several cars.

Next guides

Read cars correctlyCompare cars without a fabricated roster.→Understand Toll & RNGSeparate known labels from unknown formulas.→Choose the next purchaseUse a slot, replacement, and payback decision path.→Estimate a cash targetUse only values visible in your session.→
Sources & limitations

Official context, reported loop, no invented UI

The official Roblox experience and JOFO Games group support the game identity, incremental-simulator description, autosave statement, group reward mention, and private-server lag note. Repeated sampled gameplay narration supports the high-level roll-to-toll loop only. It does not verify exact controls, car data, odds, or upgrade formulas.

Review dated official sources →
Change log

Page verification history

DateGame version / eventWhat changedEvidence
August 25, 2026[UPD] My Toll Farm!Rebuilt the guide around the first toll loop, added pacing checkpoints, evidence levels, mistakes, and verification limits.Multi-source reported
August 16, 2026Initial guidePublished the original observation-and-calculator starting route.Official